The Meadow Brook Stables Instructors have prepared this guide to help new riders prepare for their first riding lesson. By the second to third month of horseback riding lessons, student riders should be able to handle, groom and tack-up their horses independently.
A NOTE FOR PARENTS
Learning about horses can be as rewarding for you as it is for your child. Getting to know your way around these beautiful animals is a great way to unwind and improve mental health and wellbeing – you’ll see what we mean when you get here. Even if the riding lessons aren’t officially booked for you, we welcome and invite all parents and caretakers to dive into the experience. If you have allergies or are fearful around the horses, please let a member of our riding lesson team know.
ARRIVAL
Our lessons are now taking place at 200 Stevens Road.
Upon arriving at the farm, we ask that you park near the large tarp building, parking spaces are marked with curbs. If it is your first time, a member of our team will be there to show you around and teach you how to get your horse ready for the lesson. For the first few lessons we ask that you show up no more than 5 Minutes before the start of your scheduled lesson (if you ride at 3pm, please do not show up earlier than 2:55pm). Your lesson will be an hour, and will include collecting the gear needed, collecting your horse from the field, grooming, tacking, and getting to know your lesson horse. You will be able to find your Instructor either in the Indoor Arena (the building with the white roof). Before entering the Indoor Arena please SHOUT the word DOOR just outside the small man door that is located at the frontside of the building and wait for a response to enter.
Meadow Brook Stables is a very friendly place, with lots of friendly people, so never hesitate to ask a fellow rider or parent for information if you have a question and you don’t see a staff member around.
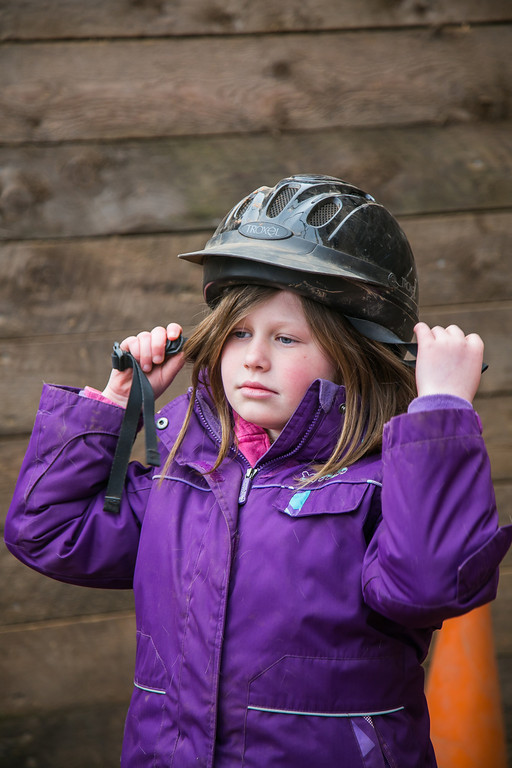
Before starting to work with the horse make sure you are wearing proper footwear (paddock boots, blundstones, or rubber boots) and your helmet. Meadow Brook Stables will not provide Helmets due to safety and Sanitary concerns, this is something you must provide for yourself or your child. Have the appropriate gear can make a big difference. Greenhawk has an excellent selection of horseback riding equipment. Ask them about their discounted “Learn-to-Ride” package and be sure to share that you will be taking lessons at Meadow Brook Stables and they will make sure you are provided with the right type of equipment for Equestrian riding lessons.
COLLECTING YOUR GEAR
First order of business will be gathering all the items you will need for your lesson (this includes grooming tools, saddle, saddle pad, bridle and boots as needed). Your instructor will show you where all these items are BEFORE collecting your horse. This is for the horses safety (not to be left unattended) as well as other riders safety.
COLLECTING YOUR HORSE
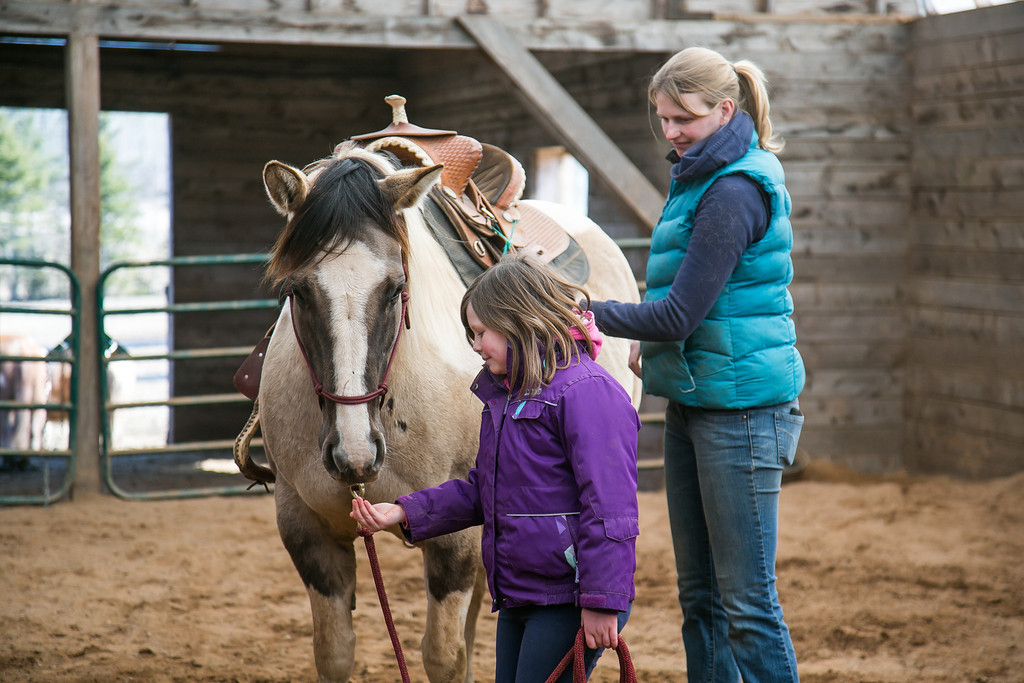
Next order of business will be finding the horse you will be riding. Your Instructor will let you know what horse you are riding that day. The horse will be enjoying some time outside with its friends. A halter and lead-rope should be used every time you are moving a horse to and from its stall.
PREPARING FOR YOUR RIDE
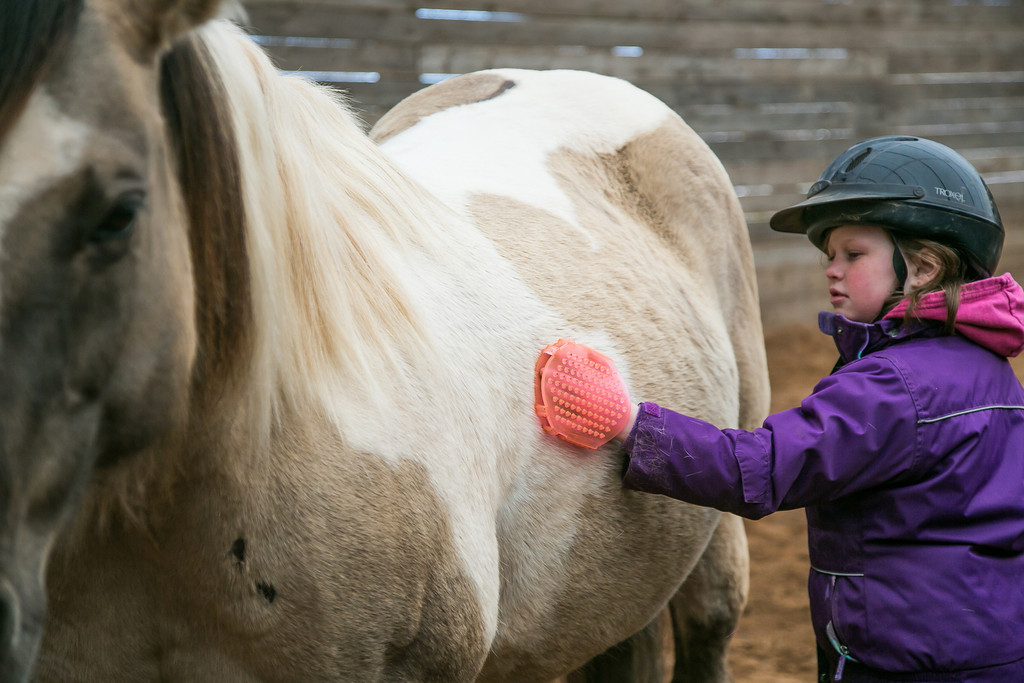
Once you have your horse tied (your Instructor will show you the proper way to tie or clip your horse to the wall), the first step will be to groom your horse. Your Instructor will go over how to safely groom your horse from head to tail, and back to hooves.
TACKING UP
The process of getting your horse’s equipment (bridle, saddle, girth etc) on for riding is referred to as getting “tacked up.” Most horses have their own saddle pad, saddle, bridle and their own halter. Horses can share different saddles and girths. The order in which you tack up is very important and follows a logical flow. Here is a basic order for tacking up your horse:
- Saddle Pad (should be clean and dry)
- Saddle
- Girth
- Bridle or Hackamore (after our warm up)
Once you have your horse tacked up, please hang their halter up on a hook (rather than leaving it laying around as other people or horses passing by could get caught up). You will then lead your horse to the ring. We always lead our horses from the left side (meaning the horse is on our right), making sure that we have taken the reins from over their head and are holding them properly without any leather hanging down where the horse could step on it.
GROUND WORK
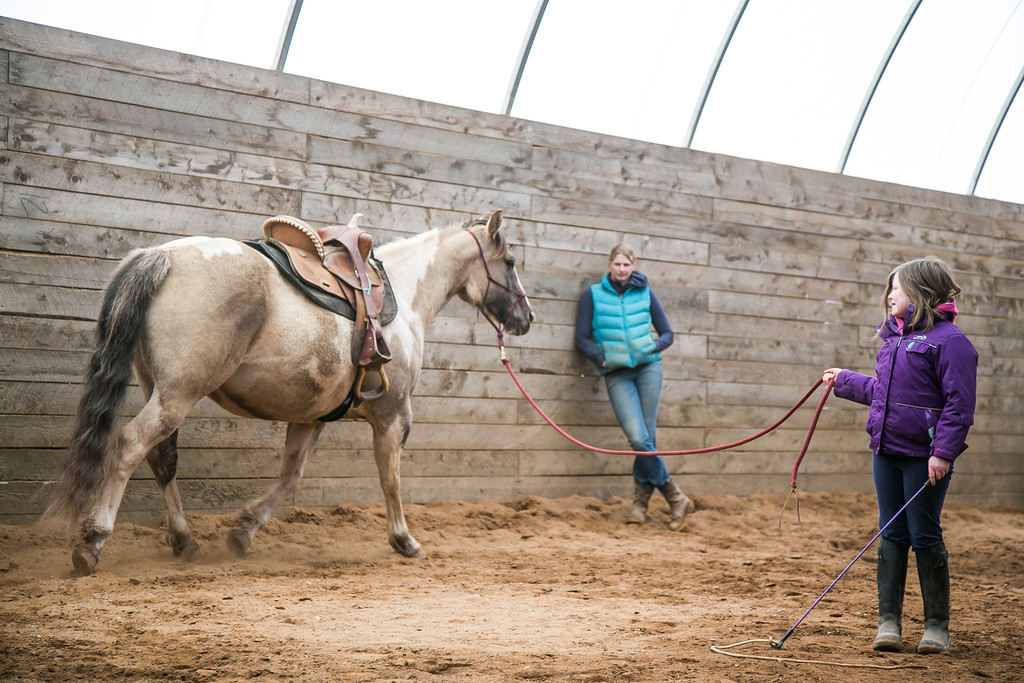
Before you get on your horse, we always take a few moments to work with them on the ground to warm them up. This is important for many reasons, it helps develop a level of communication and respect with your horse, it warms up their muscles so they are less likely to become injured, it also helps us see what kind of energy they might have that day as well as check them out to ensure they aren’t lame or sore in any way. Your Instructor will go over the exercises we do on the ground to prepare our horse for riding.
Depending on your Experience and Skill Level the first few lessons might be on the Ground to ensure that you are safe and understanding the concepts that transfer to Riding.
READY TO RIDE
Before you get on your horse, we always take a few moments to tighten the girth and determine an approximate length for our stirrups. The stirrups can be adjusted while on the horse’s back, however it is much easier and safer to establish an appropriate length prior to getting on.
Before getting on, you can determine an approximate length for your stirrup by placing your finger tips at the stirrup bars (the little metal claps up on the saddle where the stirrup leather attaches to the saddle) and pulling the stirrup straight down to your armpit (keeping your arm straight). The bottom of the stirrup pad should just reach your armpit. This will give you a stirrup length that is CLOSE to the length you will need for riding. Before getting on, eye up your stirrups to make sure they are level with one another. Once you are on the horse, remove your feet from the stirrups and let your legs relax down against the horse’s side, the stirrup footpad should line up just below your ankle bone (the pointy bone on the inside of your ankle).
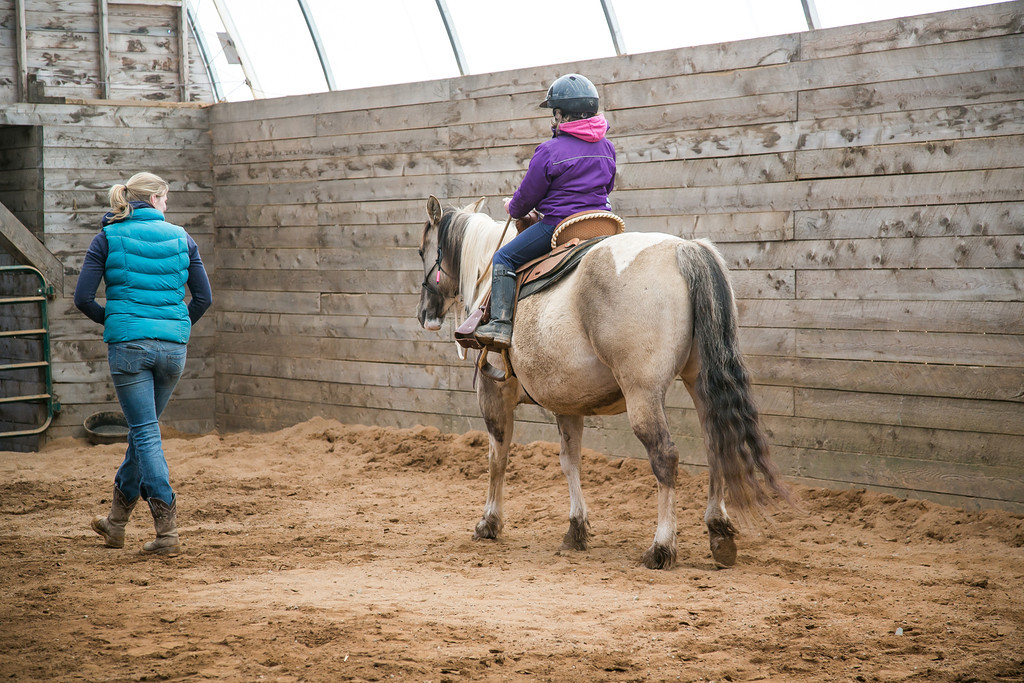
Once we have checked that the girth is tight and the stirrups are approximately the right length, you are ready to get on. We always use a mounting block to get on our horses, we never mount from the ground as it can be hard on the horse’s back. You Instructor will always be able to help you mount your horse in the beginning. As you progress, you will learn how to do this on your own, always taking care to make sure your girth is tight and you are holding both reins before getting on.
AFTER YOUR RIDE
Once you have completed your first riding lesson, you will lead your horse back into the barn to untack. If riding English it is important to “run-up” our stirrups prior to walking through any doorways or into the barn. This is a very important safety step and your Instructor will demonstrate how to run-up your stirrups. Once you arrive back at your tie ring, you can remove your horses bridle or hackamore and put in their halter. After your horse is tied and wearing its halter, you can remove the girth and saddle. We always make sure to never place tack and equipment on the ground.
Once you have removed your horses’ tack, the grooming process starts again. We pick out their feet to ensure they haven’t picked up a rock during the ride. Even though grooming takes place before and after a ride, grooming sessions following exercise are often more effective at bringing out the shine in the horse’s coat so these grooming sessions tend to be a little bit longer.
Horses love the grooming process and you will often see your efforts rewarded by your new equine friend through a big stretch, leaning into your brush, or a yawn. Horse’s do not yawn for the same reasons humans do. For horses it is called a “release” and is often a very positive sign that stress and tension is leaving their body
Once you are finished grooming, you are ready to lead the horse back into their paddock. Please remember that we always use a lead rope when leading a horse (never only the halter) and ensure that the gate is opened with plenty of space for our horse to fit through. Once in the paddock, your horse’s halter can be removed and put back in the tack room – NEVER leave a horses halter on in the field.
Prior to leaving the farm, please do a quick check to make sure your tack and grooming supplies have been returned to the Tack Room. We also sweep up the area in the hallway we were working in making sure that any bio-material (manure) left by our equine partners has been picked up and placed in a designated wheelbarrow.
Congratulations! First lesson down! We hope that this guide will help you navigate your journey with horses and set you up for success in this amazing sport.